Tuesday, July 12, 2016

Mexican Quinoa Salad


Light & delicious! Use as a side or main dish. 

INGREDIENTS 
1 cup uncooked quinoa, well rinsed
1/2 tsp sea salt
2 cups water
1/3 cup diced red onion
2 tbsp lime juice (I used the juice from one whole fresh lime)
1-15 oz can of black beans, drained & rinsed
1 cup frozen corn (I used 1 can corn with no additives, rinsed)
3 medium tomatoes, seeded and cut into chunks
Shredded cheese (I used a mozerella/Parmesan mixed pack)
1 jalapeño seeded and sliced
1/4 cup chopped cilantro
3 tbsp olive oil

PROCESS
1. Put the rinsed quinoa, salt, and water in a pot and bring to a boil. It is best to use a non-stick pot. After it boils, reduce heat, cover and let simmer for 10-15 minutes or until the water is absorbed. 
2. Remove quinoa from heat, place in a large bowl and fluff with fork to facilitate cooling. It is best to use a bowl with a lid for easier storage. 
3. While the quinoa is cooking, prep the remaining salad. First, place the chopped onions in the bowl with the lime juice and allow to soak. This will cut the sharpness of the onion
4. Warm up the rinsed black beans and corn. I put both of these in the same pot and just heated them slightly. 
5. Add the tomatoes, jalapeño, black beans/corn mix, cilantro, and onion mix to the bowl of quinoa. 

You can either cover and chill slightly or serve at room temperature. We also added in shredded cheese ,croutons, and a delicious avacado ranch dressing (found at Kroger) to ours. We added grilled chicken as well, but you can leave this off if you are vegetarian/vegan. 

INFO
Prep time: 15 min
Cook time: 25 min
Feeds: 4-6 servings 

Found original recipe on Simply Recipes. My notations are in italics. 


Monday, May 16, 2016

Crock Pot Chicken Fajitas

It's been so long since I've written a blog post or typed up a recipe! My daughter and I tried this new recipe and we love it, so I thought I would share. It is a crock pot chicken fajita recipe. The reason we love it is because we can put this on at lunch and it will be ready by dinner. Plus is makes for tasty leftovers.


INGREDIENTS
1-2 lbs of chicken - I use boneless, skinless tenderloins because they are easier to work with.
1 medium/large yellow onion
1 red pepper
1 orange pepper
1 yellow pepper - I will sometimes get the bag of  mini sweet peppers and use those.
1 package of fajita seasoning (or you can use your own seasoning mixture)
3/4 cup of salsa of choice
Fajita shells of choice
Garnishments of choice - rice, black beans, refried beans, sour cream, etc.


UTENSILS NEEDED
Medium sized crock pot
Knives
Cutting boards
Spoon (to stir)


HOW TO MAKE IT
I rinse and place my chicken into a medium sized crock pot. Be sure to follow safe handling guidelines of raw chicken by washing your hands and using new utensils on your veggies. Chop up the entire onion and place in crock pot. I like my onion chunks bigger but chop to your liking! Chop up all the peppers and place in crock pot.


Add in the fajita seasoning pack (or your mixture of seasoning - you can choose to add hotter peppers or spices if you want more heat). Measure out 3/4 cup of salsa and add to crock pot. Give everything a stir.


I set my crock pot on High setting for about 30 min and then turn down to Low and let cook for 4-5 hours. I will stir occasionally just to make sure my chicken is getting cooked.


PUT IT TOGETHER
We like black beans, refried beans, rice, cheese, and sour cream in our house. I use the smaller fajita flour shells (yes I know they are not great for you but they taste good, and 1-2 won't kill you). We layer in our extras and then add the chicken mixture to our shells for the tastiest chicken fajitas at home EVER!! I will also just put the chicken mixture over rice in a bowl and eat without shells.


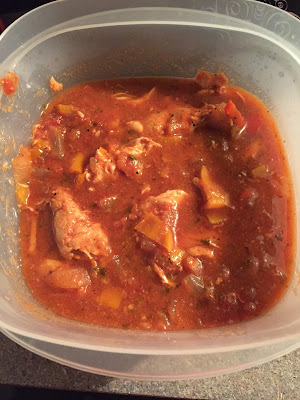
Alternative Idea! You could add a few more ingredients and have a spicy Mexican soup!


The end result getting ready for leftovers!


Thursday, November 5, 2015

Vegan Broccoli & "Cheese" Soup

Eating clean and want an idea for a warm, creamy all vegan soup for these upcoming cold winter nights? Look no further! This soup will make you never crave "traditional" broccoli and cheese soup ever again!!


Prep Time: 15 minutes
Cook Time: 40 minutes
Total Time: 55 minutes
Serves: 4-5 cups


EQUIPMENT
Medium sized stove top pot
Two baking sheets
Parchment paper
Handheld blender/Vitamix
Measuring utensils
Cutting board
Knife


INGREDIENTS
4 medium/large russet potatoes, diced with skins (should be 4 rounded cups)
      Two more russet potatoes diced with skins, to roast for garnish
2 heaping cups of broccoli florets (fresh or frozen)
1/2 cup finely chopped onion
3-4 garlic cloves, minced
2 cups water
Sea salt and pepper to taste (1 tsp salt, 1/4 tsp pepper)
1 1/2 tsp smoked paprika (I used regular paprika)
1/2 cup light coconut milk (or other creamy plant-based milk, but not almond milk)
3 tbsp nutritional yeast (from Whole Foods or Fresh Market - not regular yeast!)
2 tbsp dill pickle juice 


INSTRUCTIONS
Preheat oven to 375 degrees.
1. Wash and chop potatoes, leaving skins, and add to pot.
2. Add the water, salt, pepper, onion, garlic, and paprika, and bring to a boil. Once boiling, turn down and simmer for approximately 20 minutes (until potatoes are tender).
3. Optional - chop another 2 potatoes for garnish. Sit aside for a minute.
4. While your potatoes are simmering on the stove top, get out 2 baking sheets and cover with parchment paper. Add your chopped broccoli (fresh or frozen) to one and the extra potatoes you chopped to the other one. Bake the broccoli for 15 minutes, leaving the potatoes in for another 10 minutes (total of 25 minutes). Set a timer so you don't forget your potatoes are still in the oven!
5. When your potatoes in the pot get tender, remove from heat and add in the coconut milk, nutritional yeast, and pickle juice. Use a handheld blender (or I put my mixture in my Vitamix) and blend until creamy and thickened. Adjust spices as desired (I didn't need to add anything to mine)
6. Add in the cooked broccoli and stir. Top with your roasted potatoes for garnish and ENJOY!!


You can refrigerate but it will thicken. Add in vegetable broth or water to thin and reheat on the stove top.


NUTRITIONAL INFO
Serving size: 1 cup | Calories: 207 | Fat: 2.25g | Carbs: 37.3g | Sugar: 3.3g | Sodium: 567g


Sunday, January 11, 2015

Eggplant Hummus

Eddie and I found an eggplant hummus at Kroger last summer. It was so delicious! Since we moved, we haven't been able to find any again. When I started making hummus at home, I decided to make some. Eddie wanted to twist it up a but and use dark red kidney beans instead of chick peas. Here is the recipe! You can always just use the chick peas for a more traditional hummus. 

TOOLS
Food processor
Glass dish (to roast eggplant)
Small spatula
Knife
Cutting board 
Airtight container
Measuring spoons

INGREDIENTS
1 large eggplant
1 (15 oz) can dark red kidney beans (or chick peas), drained and rinsed
2 tbsp fresh lemon juice
3 tbsp tahini
2 cloves garlic (feel free to adjust to your liking)
1 tsp sea salt
1/4 tsp cumin


MIX IT UP!
1. Preheat oven to 400 degrees. 
2. Place eggplant in glass dish (I lined mine with a piece of parchment paper so it didn't stick). 
3. Bake the eggplant for 40 minutes. Remove from oven and let cool while mixing other ingredients. 
4. Place rinsed kidney beans into food processor. The kidney beans will give this a purplish color. Chick peas will yield a cream color.  
5. Peel and chop garlic cloves. Add to food processor along with other ingredients. 
6. Mix up base ingredients by pulsing for 2 minutes. 
7. Peel the cooled eggplant and rough dice. 

8. Add the eggplant pieces to your food processor. You will think it won't fit but it will. It's messy. I took 1/2 the eggplant and added to food processor, pulsing this for 2 minutes. Then I added the rest of the eggplant and pulsed that for another 2-4 minutes, until smooth. 

9. Place hummus mixture into airtight container. Chill and enjoy!


Saturday, January 10, 2015

Taco Soup Recipe

So a co-worker told me about taco soup and since I love Mexican food, this was a no brainer for me! My only issue is that it called for processed packets of ranch dressing and taco seasoning. Since I'm trying to eat a plant-based diet, I had to substitute but, have no fear, I was still able to add delicious flavor to this dish! This is a great meal for a rainy or cold day. 

INGREDIENTS
1 cup vegetable broth
2 tbsp chopped poblano pepper 
2 fresh Dill sprigs, chopped
4 fresh Parsley sprigs, chopped
1 28oz can Muir Glen fire roasted tomatoes (can find at Publix, Kroger and Whole Foods)
1 15oz can black beans (I get ones that are only beans and water)
1 15oz can pinto beans (I get ones that are only beans and water)
1 15oz can sweet corn
1 green onion, chopped
1/3 yellow pepper, seeded and chopped
1/3 orange pepper, seeded and chopped (you can use red and/or green peppers if desired)
1 clove garlic, peeled and chopped
1/3 large yellow onion (or 1/2 medium)
1/2 tsp sea salt
1 tbsp chili powder
1 tsp cumin


MIX IT UP!
Add everything to a medium-sized crockpot and put on high for 4 hours. If you are eating this later in the day, you can do a lower setting for longer hours. Serve in your favorite bowl with favorite toppings. I made a small baked potato and poured my soup over it for a hearty meal. You could add sour cream or cheese if you eat dairy. The possibilities are endless! Enjoy!


Black Bean Hummus

Ok, so I love hummus! And not just the plain kind. We used to go to a restaurant that would serve a hummus tri of plain, red pepper, and black bean. The black bean quickly became one of my favorites! Here is how I make this yummy treat. It's much better than store bought. 

TOOLS
Food processor
Small pot
Small spatula
Knife
Cutting board 
Airtight container
Measuring spoons


INGREDIENTS
1 15 oz can black beans, rinsed
2 tbsp lemon juice (I used the juice of one medium lemon)
1 clove garlic
1 1/2 tbsp tahini
3/4 tsp cumin
1/2 tsp sea salt
1/4 tsp cayenne pepper
1/4 tsp paprika
1 tbsp olive oil

MIX IT UP!
1. Rinse and heat your black beans until warm. 
2. Peel and chop the garlic clove. I use 1 clove. You can certainly add more to your taste
3. Remove beans from pot and add to food processor.
4. Add garlic and all other ingredients to food processor. 
5. Pulse until mixed into a paste. 
6. Please in air tight container and refrigerate. Enjoy!


Friday, January 9, 2015

Roasted Red Pepper Hummus

In love with this stuff!!! I discovered my love of hummus last year. My problem is that the store bought stuff is very acidic and chemical tasting to me. I decided to make my own! Here is the recipe to yumminess! 

TOOLS
Food processor
Cookie sheet
Foil
Gallon sized ziplock bag
Small spatula
Knife
Cutting board 
Airtight container
Measuring spoons

INGREDIENTS
1 large red pepper
1 (15 oz) can chick peas, drained and rinsed
3 tbsp fresh lemon juice
3 tbsp tahini
1 clove garlic (originally called for 2 but I'm not a big garlic person- feel free to adjust to your liking)
1/2 tsp sea salt
1/4 tsp cumin
2 tbsp olive oil
Parsley and red pepper flakes for garnish, optional


MIX IT UP!
1. Line a cookie sheet with foil (don't skip this step)
2. Turn your oven on broil setting
3. Core and seed peppers, cutting them into quarters - these don't have to be perfect 
4. Line peppers on cookie sheet with skins up and broil for 10-12 minutes
5. While peppers are roasting, open and rinse your chick peas. Add them to the food processor 
6. Peel and chop your garlic and add to food processor 
7. Also add the lemon juice, tahini, salt, and cumin to the food processor and pulse for 2 minutes, scraping down sides and bottom as needed to mix thoroughly (I did this twice)
8. Get peppers out of oven and immediately transfer to a gallon sized ziplock bag. Leave to rest for 10 minutes. 
9. Once peppers cool, peel skin off and chop in large pieces
10. Add heaping 1/2 cup peppers and olive oil to food processor. You will have peppers left yet you can add to top for garnish. Pulse for 1 minute. Scrape down sides and check consistence. Continue pulsing until smooth. You can add 1 tbsp water if you want it thinner (I did not find the need for the water.)
11. When desired consistence is achieved, transfer to an airtight container, add your garnish. Enjoy! Keep refrigerated.